Onboarding a website
Before WAAP can protect anything you must onboard a website: tell WAAP the domain and its origin, provision TLS, pick security features, then switch the domain's DNS to route through the edge.
The onboarding wizard
Open Onboarding (or Onboarding Domain Now / Add Website from the Websites page). It's a four-step wizard: Resume/Restart → Domain & Origin → SSL → Security Features.
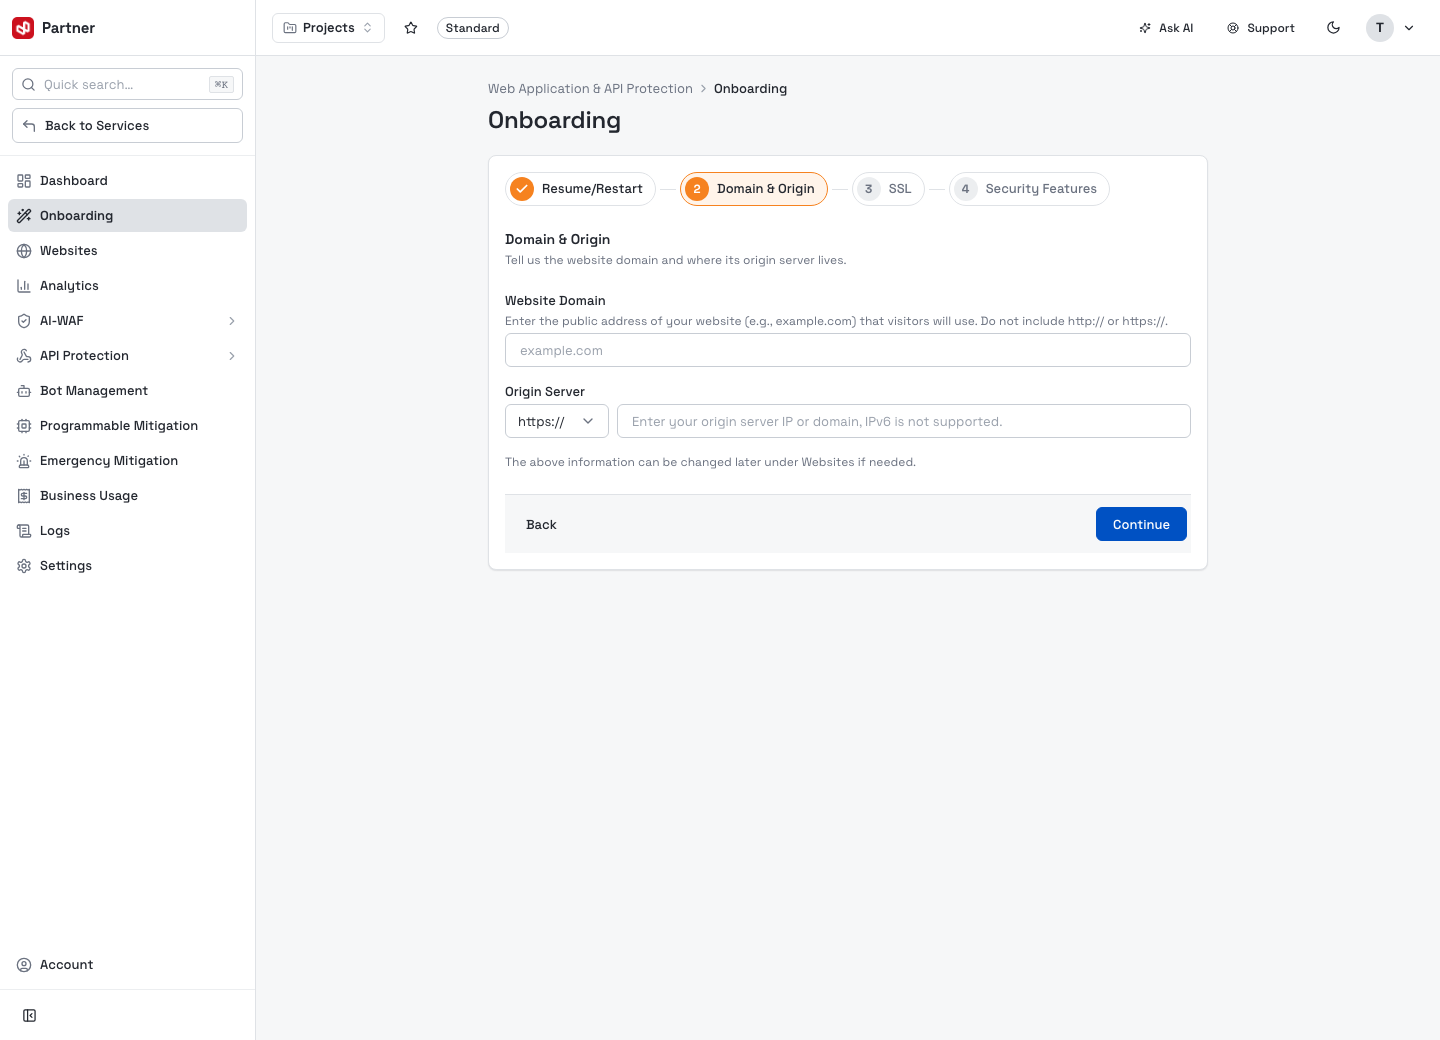
- Resume/Restart — continue a previous onboarding or start fresh.
- Domain & Origin
- Website Domain — the public hostname visitors use (e.g.
example.com), withouthttp://orhttps://. - Origin Server — the scheme (
https://) plus your origin IP or domain (IPv6 not supported). This is where WAAP forwards clean traffic. - You can change these later under Websites.
- Website Domain — the public hostname visitors use (e.g.
- SSL — provision or upload the TLS certificate WAAP terminates at the edge.
- Security Features — choose the protection to switch on for the site (subject to your plan).
Finish the wizard, then point the domain's DNS at the edge (a CNAME/target shown by the console) so traffic flows through WAAP.
Websites
The Websites page lists every onboarded site — Domain, Alternate Domain Names, Service ID, Create Time and per-row Operation buttons.
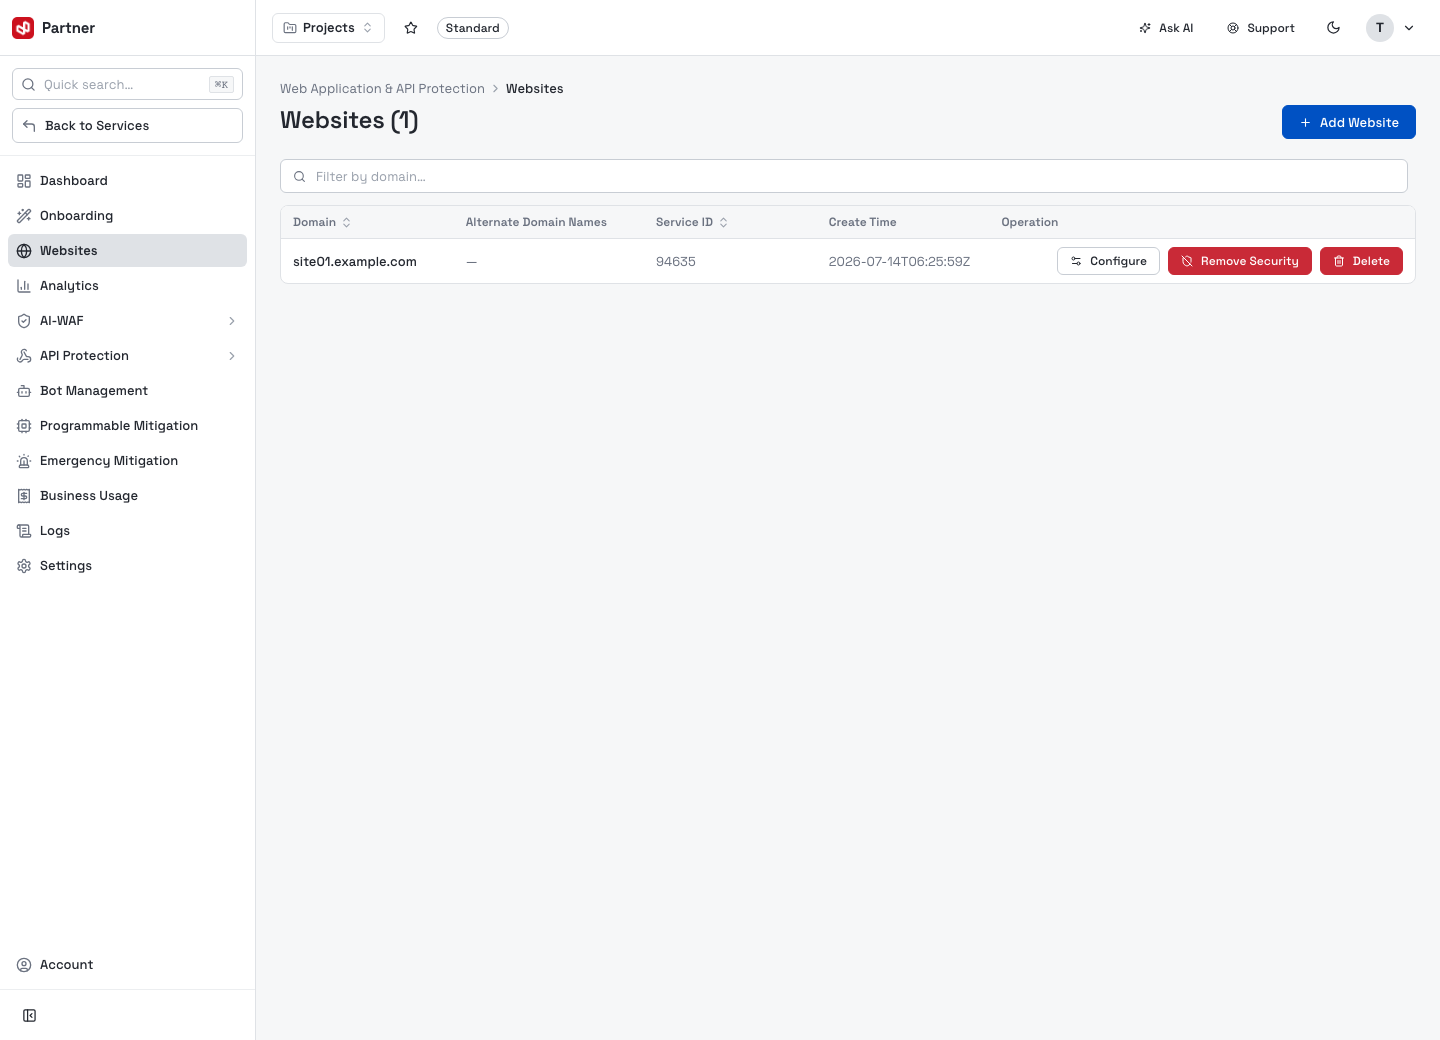
- Add Website (top right) or Onboarding Domain Now launches the wizard; Filter by domain searches the list.
- Each row has:
- Configure → the website's configuration (origin, access control, caching, TLS, headers, purge, prefetch).
- Remove Security — stop protecting the site without deleting it.
- Delete — remove the website from WAAP.