Add New Site (Add Site)
The Add Site feature allows checking and configuring domains to integrate CDN on the Multi-CDN system. The process is performed through the following steps:
Technical Process When Adding a New Site
When a site is added to VNIS, the system will perform the following steps:
-
Domain Validity Check:
- Verify domain syntax and format
- Verify domain doesn't exist on the system and is owned by another account
- Check existing records from the DNS provider the domain is currently using
-
Create DNS Zone File:
- Create new zone file in the DNS system
- Configure initial NS records
-
Initialize CDN Configuration:
- Register domain with CDN providers
- Create default configuration for cache rules and routing policy
-
Set Up Monitoring System:
- Initialize usage metrics tracking for Smart Load Balancing
Step 1: Check Eligibility

Actions:
- Enter the domain name to check (example: example.com) in the input field
- Click the Check button to start checking
- The system will display "Checking CDN eligibility for [domain]..." status during processing
Technical Checking Process:
- DNS Lookup: Check current A, AAAA, CNAME and NS records
- HTTP(S) Check: Check connectivity and TLS handshake capabilities
- Content Type Analysis: Analyze content types to suggest appropriate CDN configuration
Step 2: Domain Verification and CDN Selection (Review Domains)
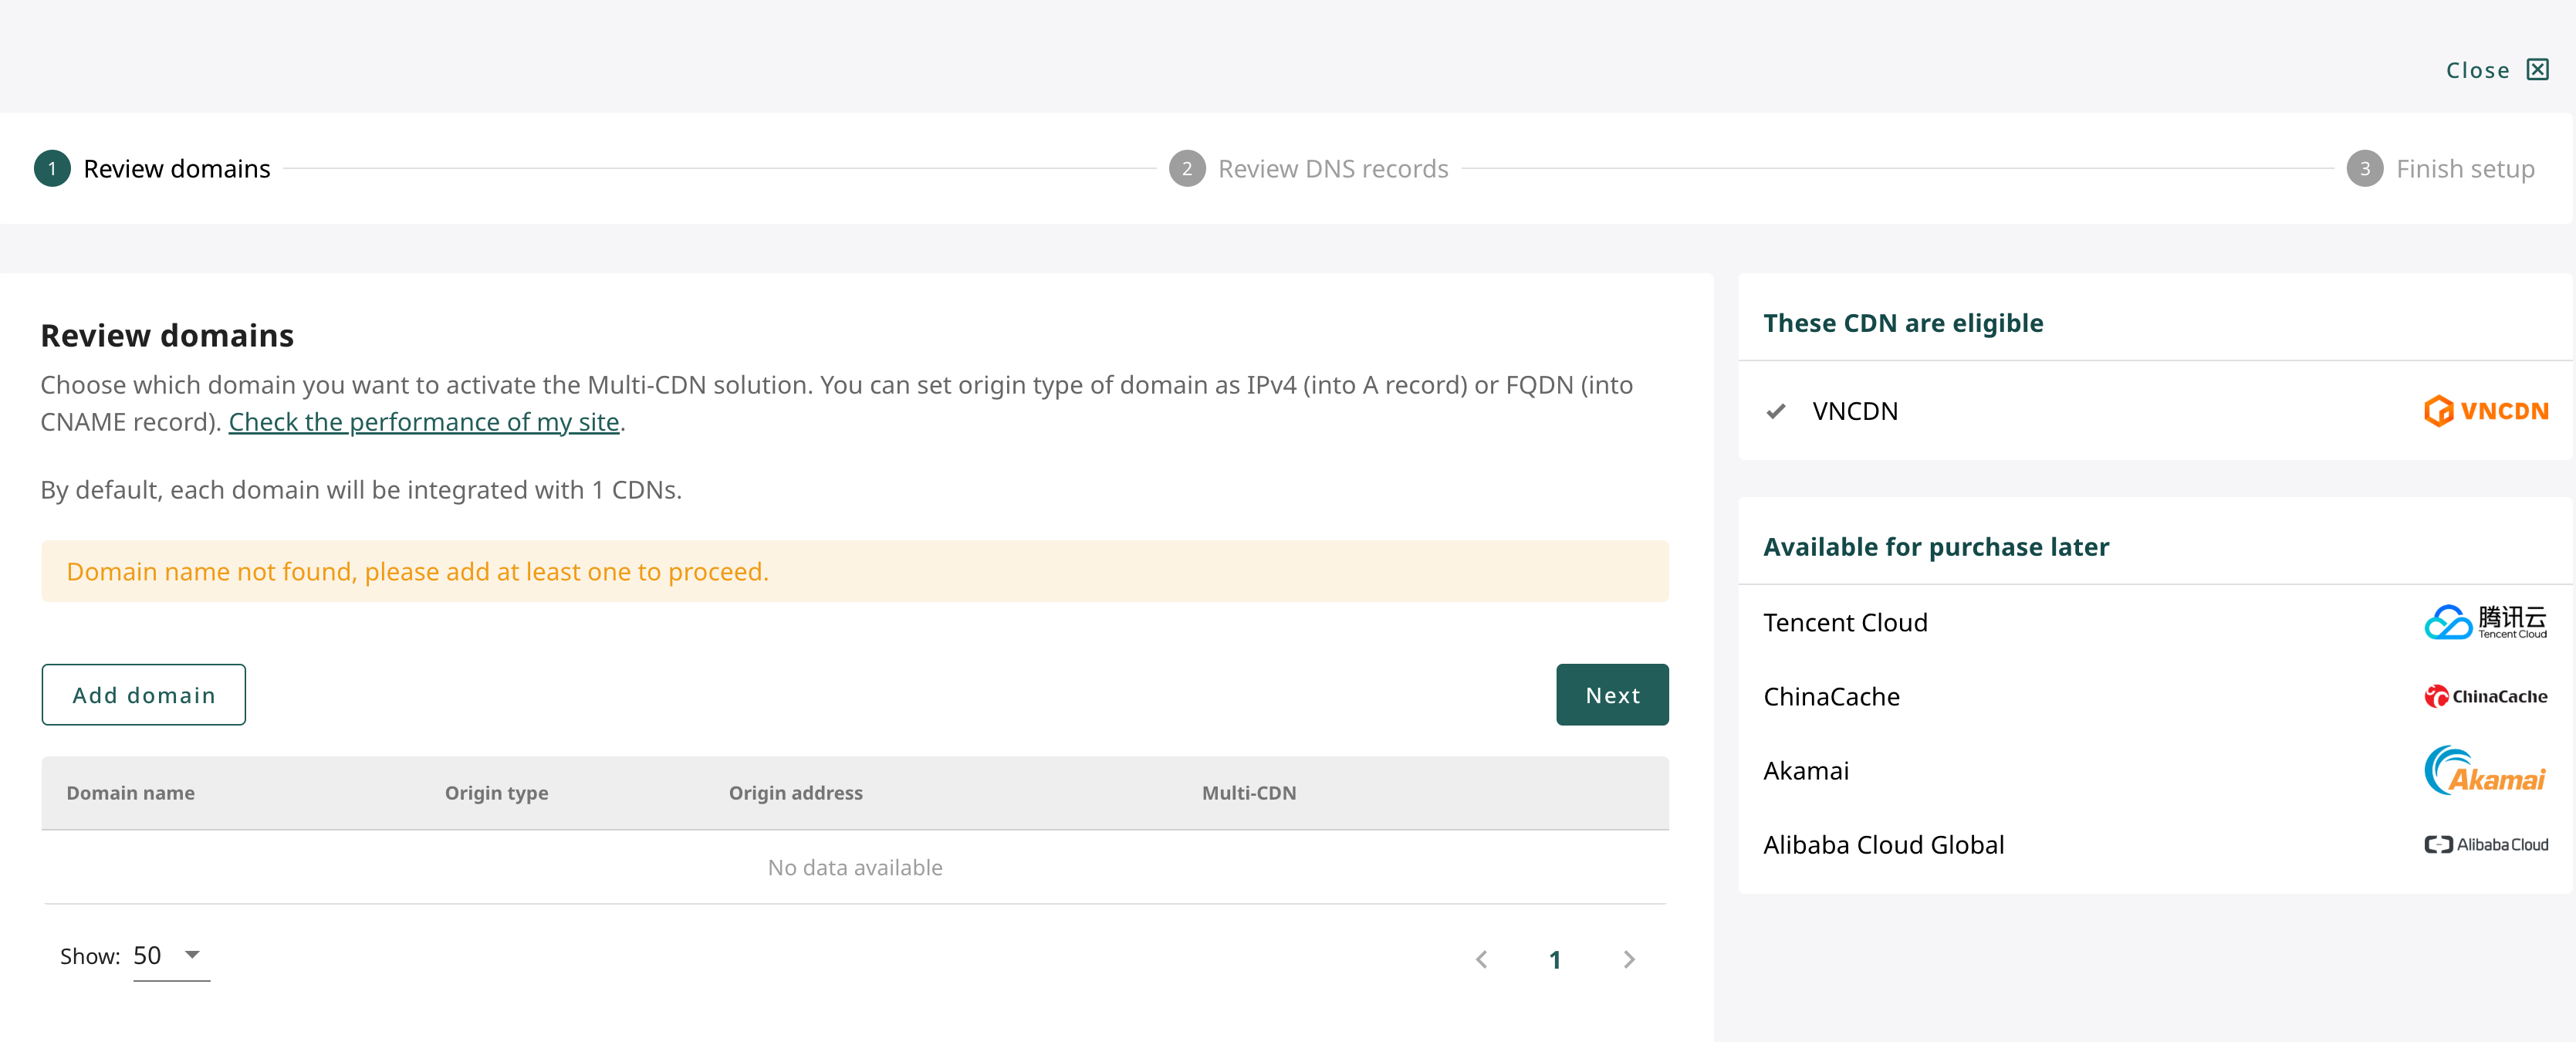
Display Results:
- If domain is valid: System displays list of existing domain records that can be integrated
- If domain not found: Warning appears "Site already exist (need to be changed)"
Interface Components:
- Domain table: Displays Domain name, Origin type, Origin address, Multi-CDN
- Add domain button: To manually add domain if no data exists
- CDN List:
- Eligible CDN: CDNs ready for activation (example: VNCDN)
- Available for purchase later: Other CDNs (Tencent Cloud, ChinaCache, Akamai, Alibaba Cloud)
- Next button: To continue after adding domain
Multi-CDN Technical Specifications:
-
VNCDN: CDN with PoPs in Vietnam, Singapore, Hong Kong
- Supports HTTP/2, HTTP/3
- High-performance caching
-
Tencent Cloud: Global CDN network with advantages in China
- Optimized for video/gaming content
- WebSocket support
Step 3: Add New Domain
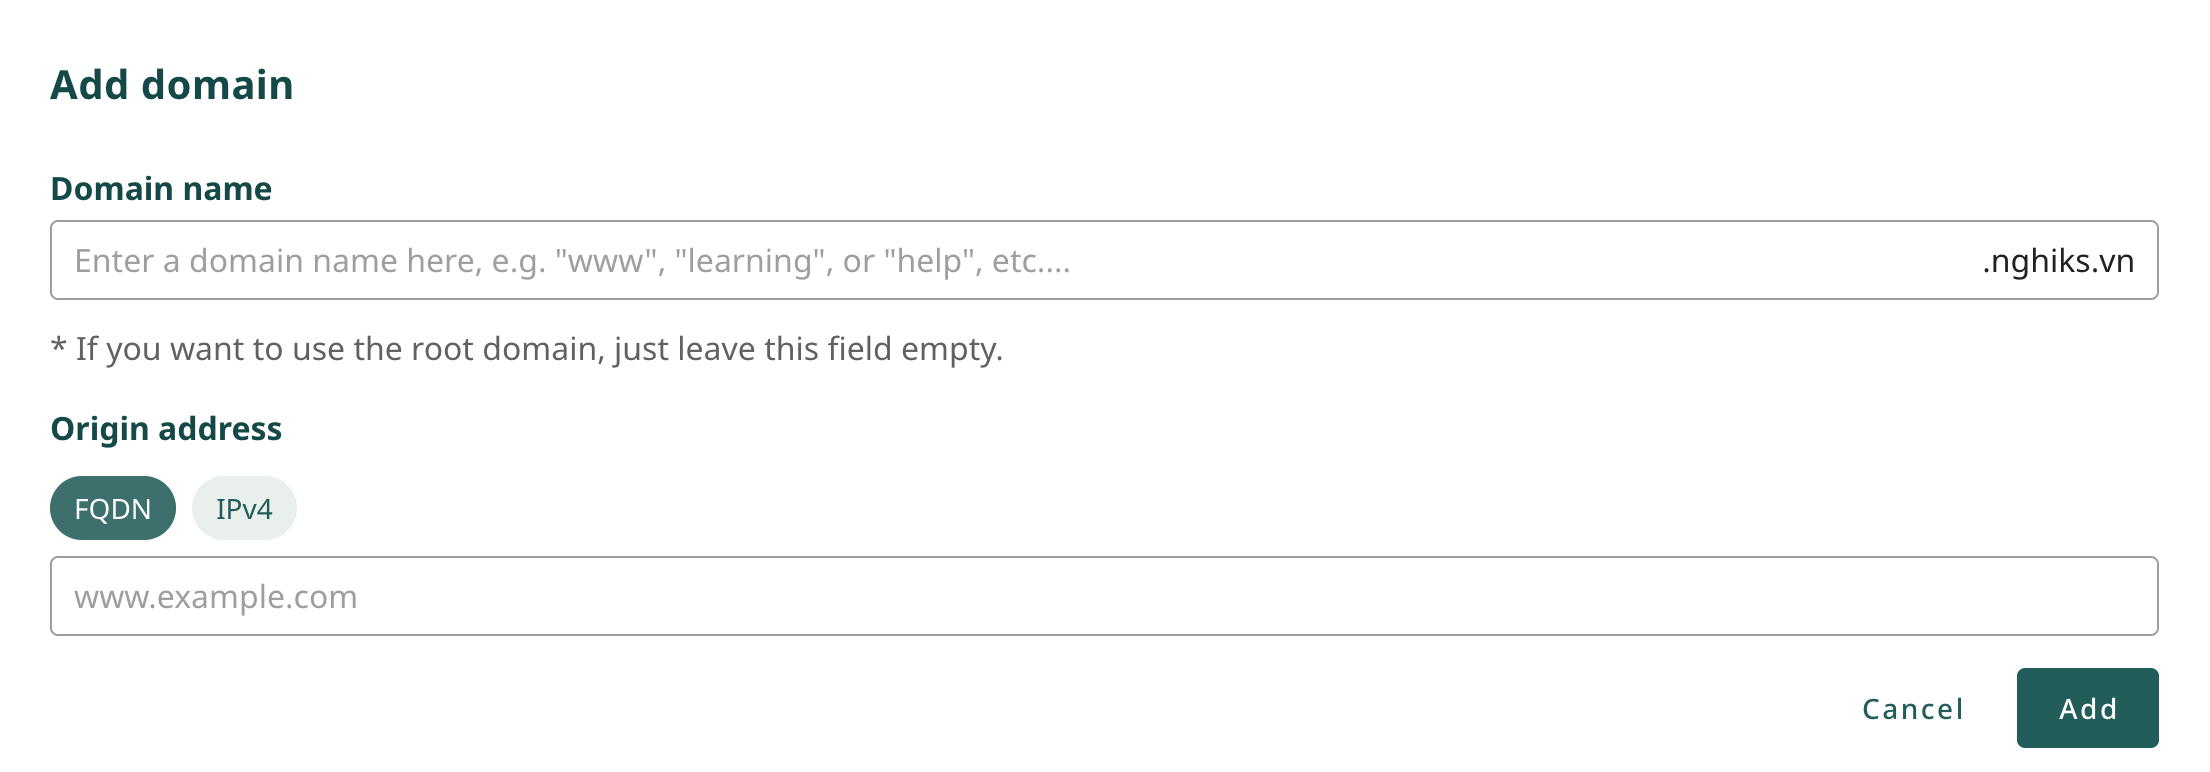 When clicking Add domain, a popup window displays with fields:
- Domain name: Enter subdomain (example: www, api) or leave blank to use root domain
- Origin address: 2 options:
- FQDN (default): Enter origin address as domain name (example: www.example.com)
- IPv4: Enter origin IP address
Advanced Origin Configuration:
- Protocol: HTTP, HTTPS or Match client (default)
- Port: 80, 443 or custom
- Connect Timeout: Connection timeout to origin (default: 10s)
Actions:
- Fill in domain and origin address information
- Click Add to save domain, or Cancel to cancel operation
- Added domain will appear in the list with complete information
Step 4: Check and Configure DNS Records (Review DNS Records)
 After successfully adding domain, the system will move to DNS configuration step:
Information Displayed:
- Record list: List of existing DNS records for the domain:
- Type: Record type (example: A, AAAA, CNAME)
- Record name: Record name (example: a.example.com)
- Value: Corresponding IP address or FQDN
- TTL: Record time to live (example: Auto)
- Multi-CDN: Boosted/Standard status
Multi-CDN Mechanism:
- Standard: Use regular DNS without activating Multi-CDN
- Boosted: Activate intelligent routing between CDNs with:
- Dynamic Performance Selection: Automatically choose fastest CDN
- Availability Monitoring: Automatically switch when detecting errors
- Geographic Routing: Route based on user location
Main Actions:
- Enable/Disable Multi-CDN: Use toggle switch on the right of each record to activate Boosted mode
- Add record: Add new DNS record if needed
- Next: Click to continue to final configuration step
Step 5: Complete DNS Setup (Finish Setup)
After configuring DNS records, the system will require pointing the domain to VNIS DNS system to complete the Multi-CDN integration process.
This step is only necessary if customers want to use VNIS DNS. If customers want to continue using their current DNS, they can skip this step and still use basic service features.
Nameserver Technical Information:
- Structure: VNIS nameservers operate on Anycast model
- Security: Support DNSSEC and modern DNS security protocols
Nameserver Change Instructions:
- Access domain management page (registrar)
- Remove all current nameserver configuration
- Replace with VNIS nameservers:
- Nameserver 1:
ns1.dns.vnis.vn - Nameserver 2:
ns2.dns.vnis.vn
- Nameserver 1:
- Use copy button next to each to quickly copy nameserver addresses
Click Finish setup to complete the setup process. The domain will then be put into DNS verification pending status.
- DNS verification time can take from a few minutes to 48 hours depending on registrar update speed and TTL of old records
See Also
- Delete Sites - Complete site removal with safety checks
- Add New DNS Records - Create DNS entries with validation
- Multi-CDN Management - Configure intelligent traffic routing
- Site Management Overview - Comprehensive DNS and domain management