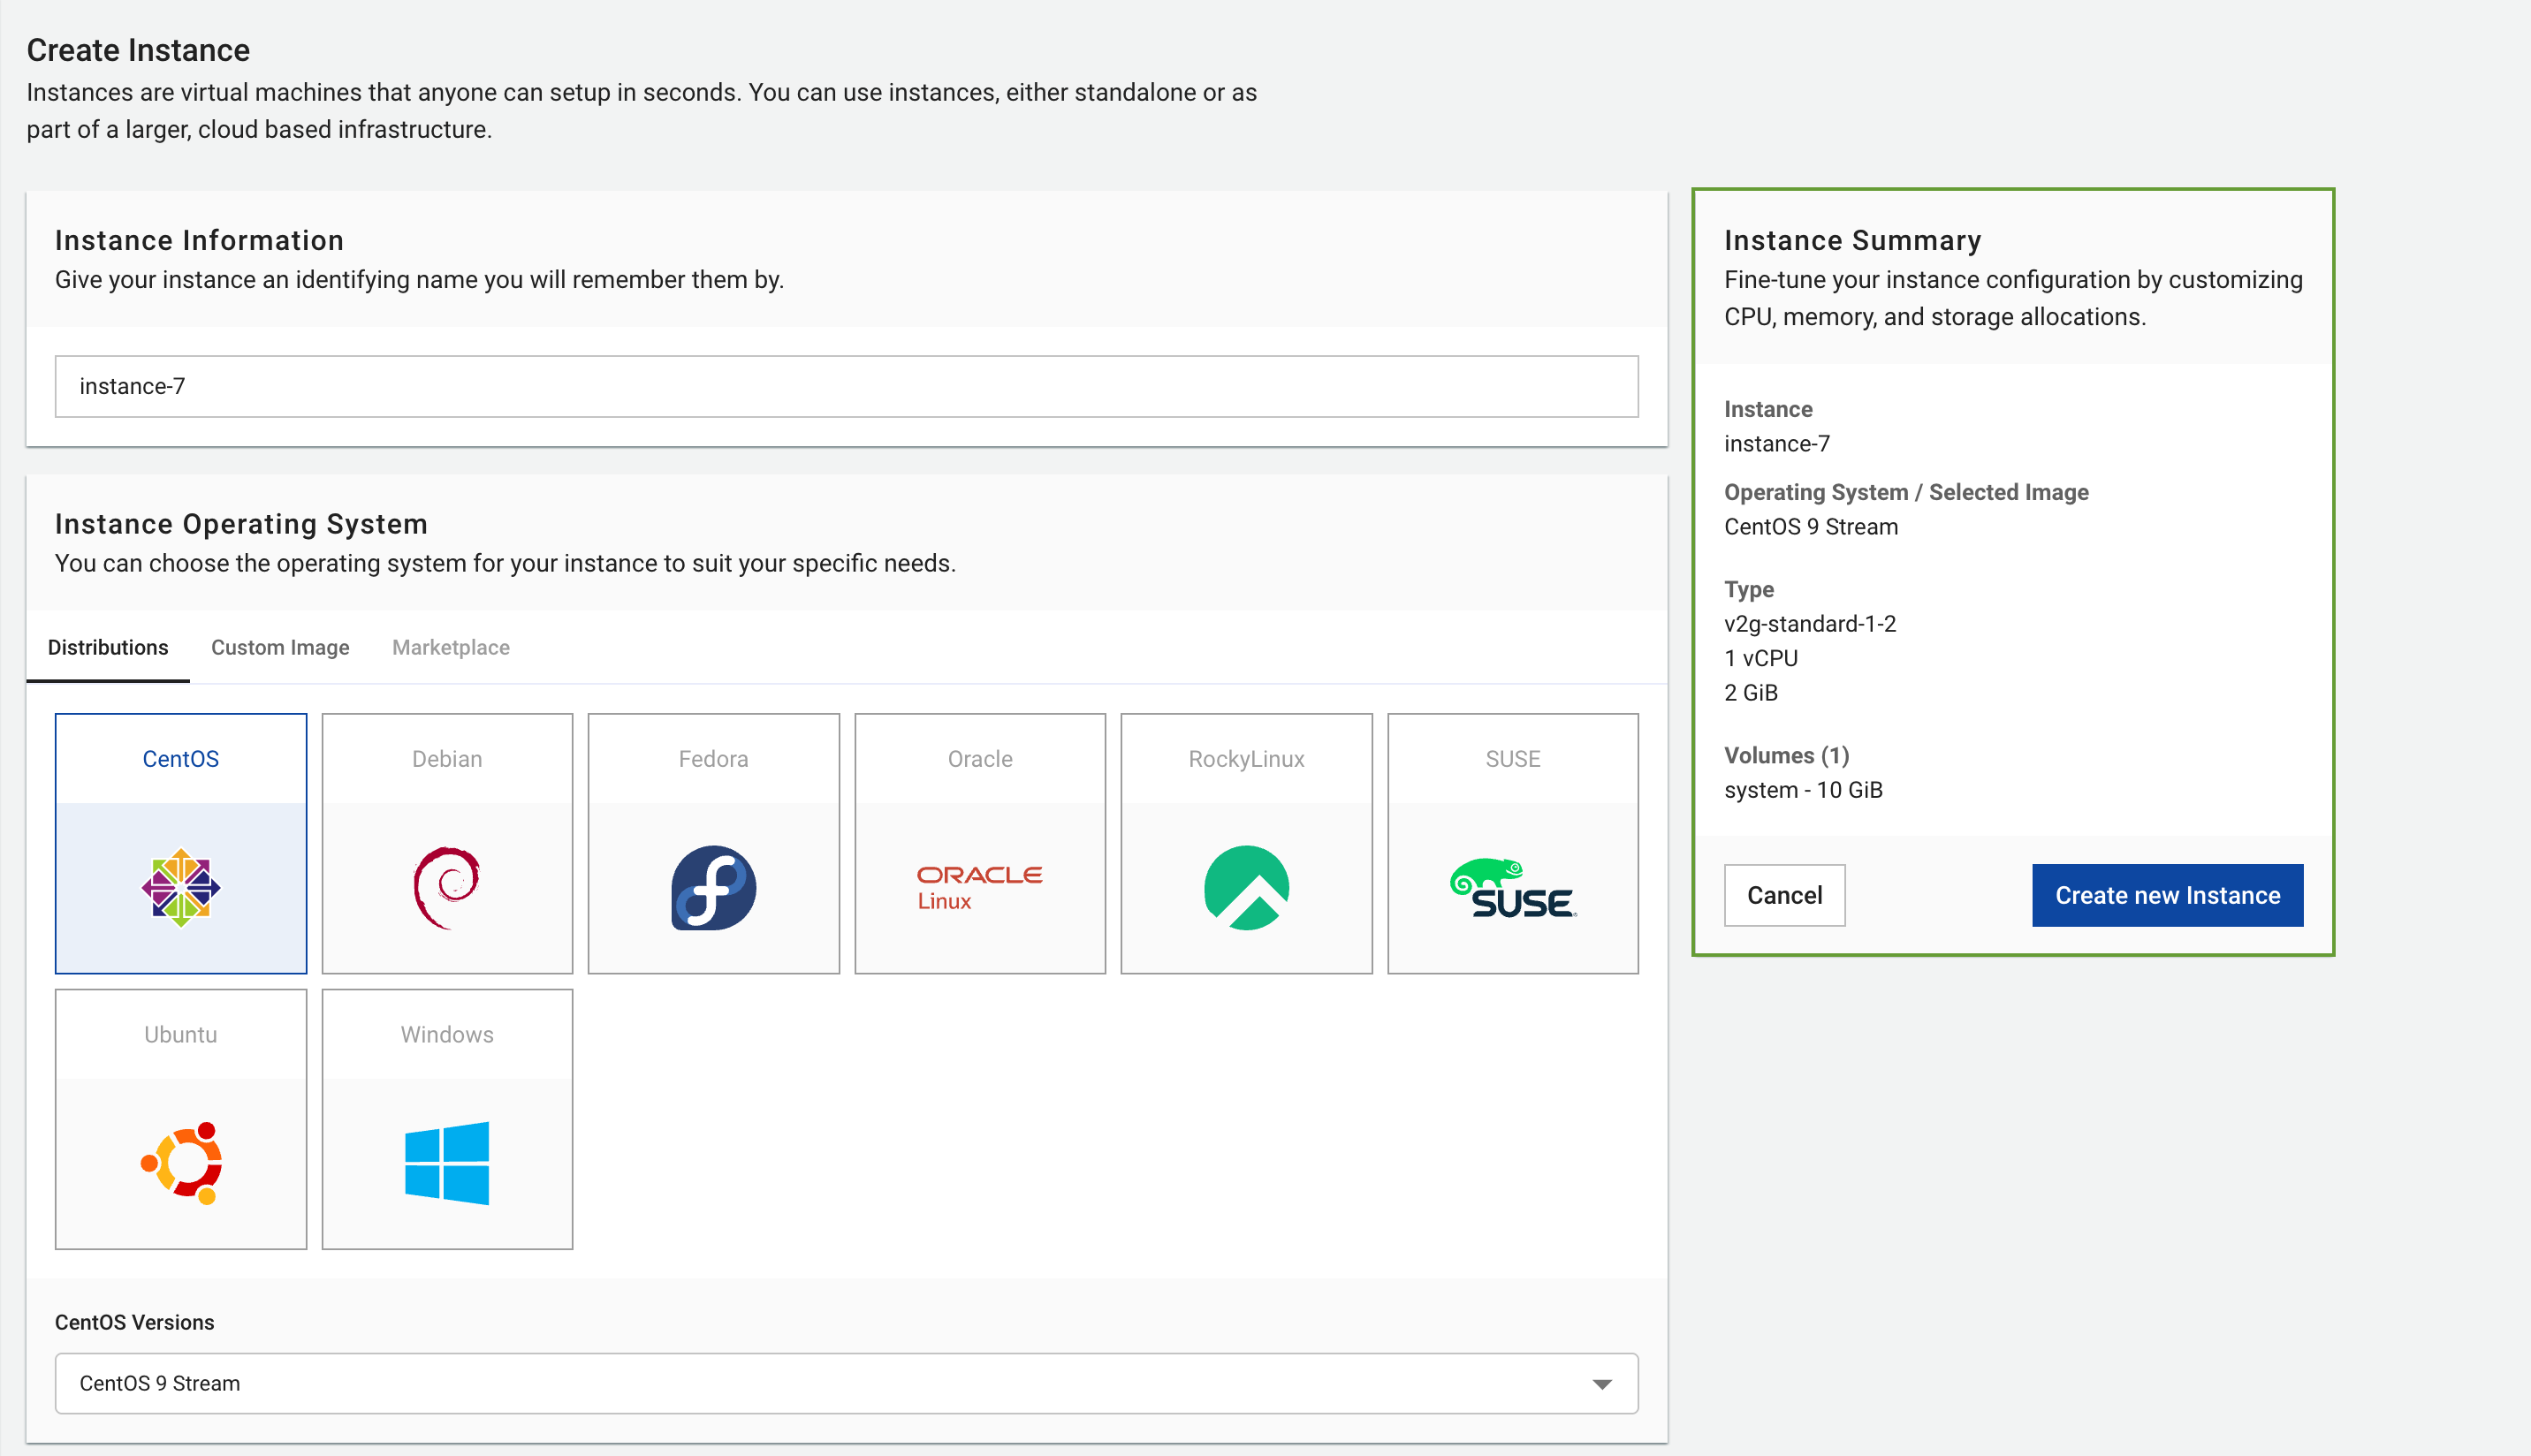
Create Instance
The Create Instance function allows you to launch new virtual machines on the vCloud platform with customizable configurations based on your requirements.
Pre-Creation Planning
Before starting, prepare:
- Define Purpose: Web server, database, application requirements
- Estimate Resources: CPU, RAM, disk capacity needs
- Select OS: Linux, Windows, specific versions
- Network Planning: Static/dynamic IP, security group requirements
- Authentication Method: SSH key (Linux) or password
Access Creation Interface
Two ways to access the instance creation interface:
- From Instance Dashboard: Click Create new Instance
- From instance management page: Click Create Instance in top-right corner
Instance Creation Workflow
1. Instance Information

Enter a descriptive name for your server. This name appears in the management list for easy identification.
Naming Best Practices:
- Use concise but descriptive names
- Add sequential numbers for multiple similar servers
- Avoid special characters or spaces
Good Examples:
web-prod-01: Production web server #1db-mysql-main: Main MySQL database serverapp-test-env: Application testing environment
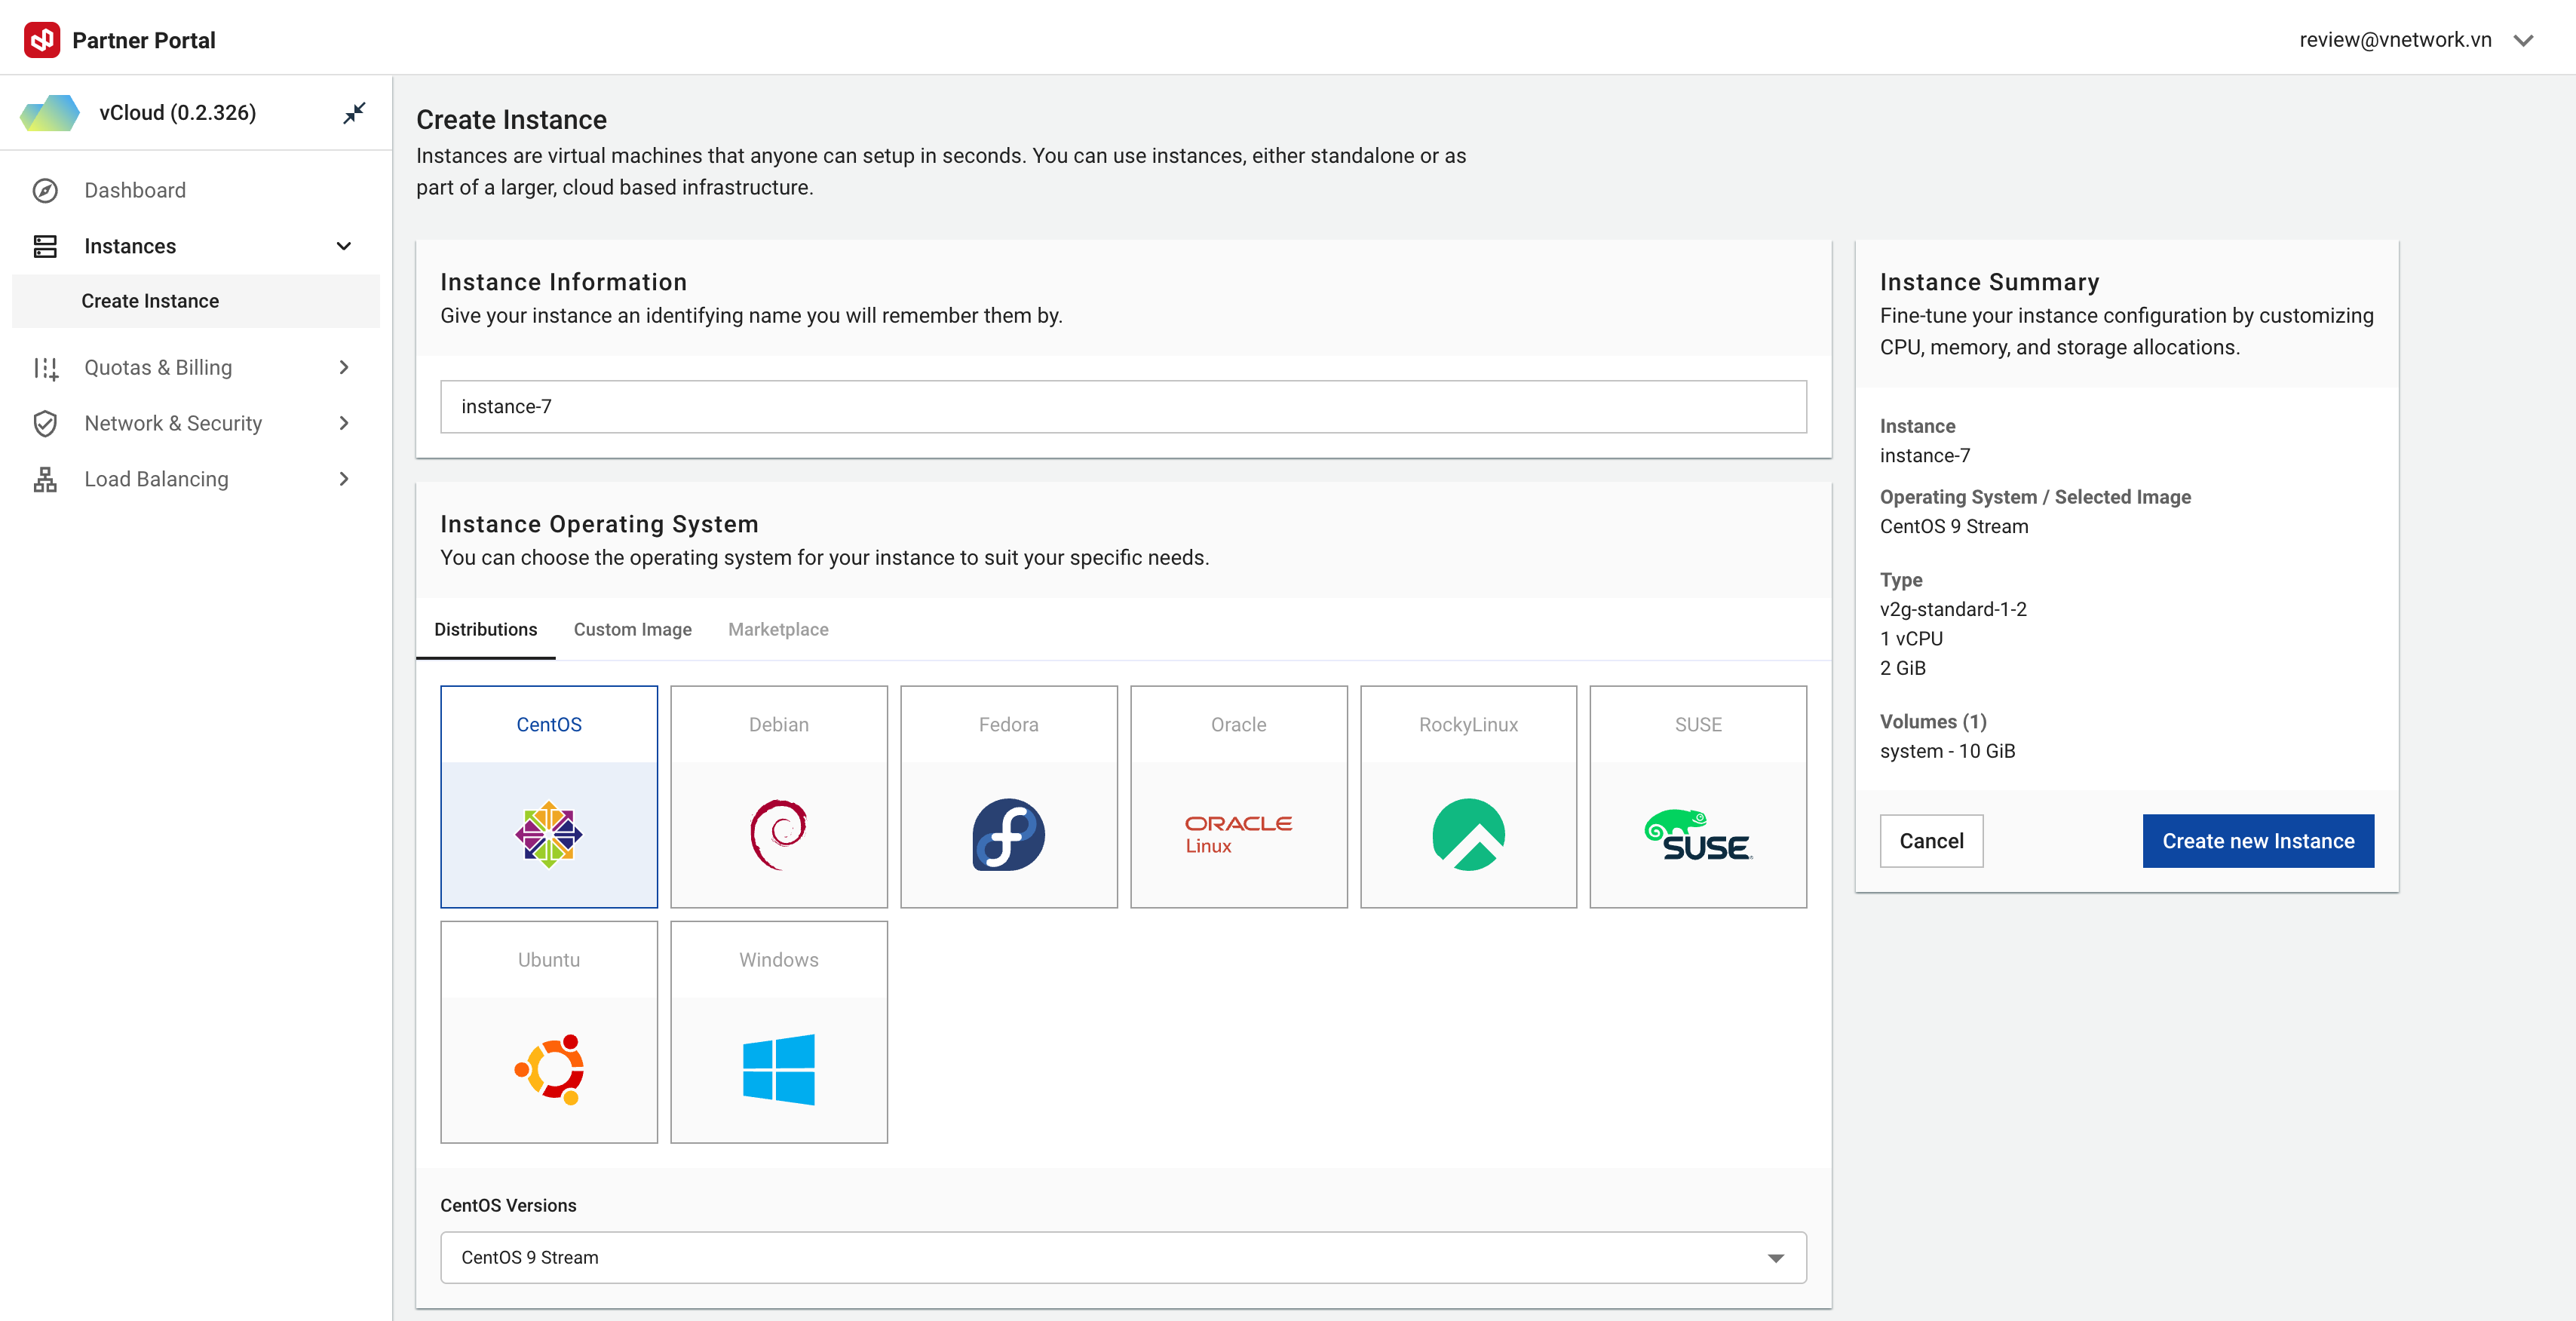
2. Operating System Selection
Choose the operating system and version that matches your requirements:
Available Options:
- Distributions: Popular OS like CentOS, Ubuntu, Debian, Windows
- Custom Images: Use pre-configured custom images (if available)
- Marketplace: Pre-built application templates like WordPress, LAMP stack
Selection Guide:
| Operating System | Recommended Version | Best For |
|---|---|---|
| Ubuntu | 22.04 LTS | Web servers, development environments, general applications |
| CentOS | 7.x or Stream 9 | Enterprise servers, stability-critical applications |
| Debian | 11 (Bullseye) | Web servers, stability-focused applications |
| Windows Server | 2022 | .NET applications, Windows services |
Important Notes:
- LTS (Long Term Support) versions recommended for production
- Verify application requirements before OS selection
- Marketplace templates save setup time but may include unnecessary components
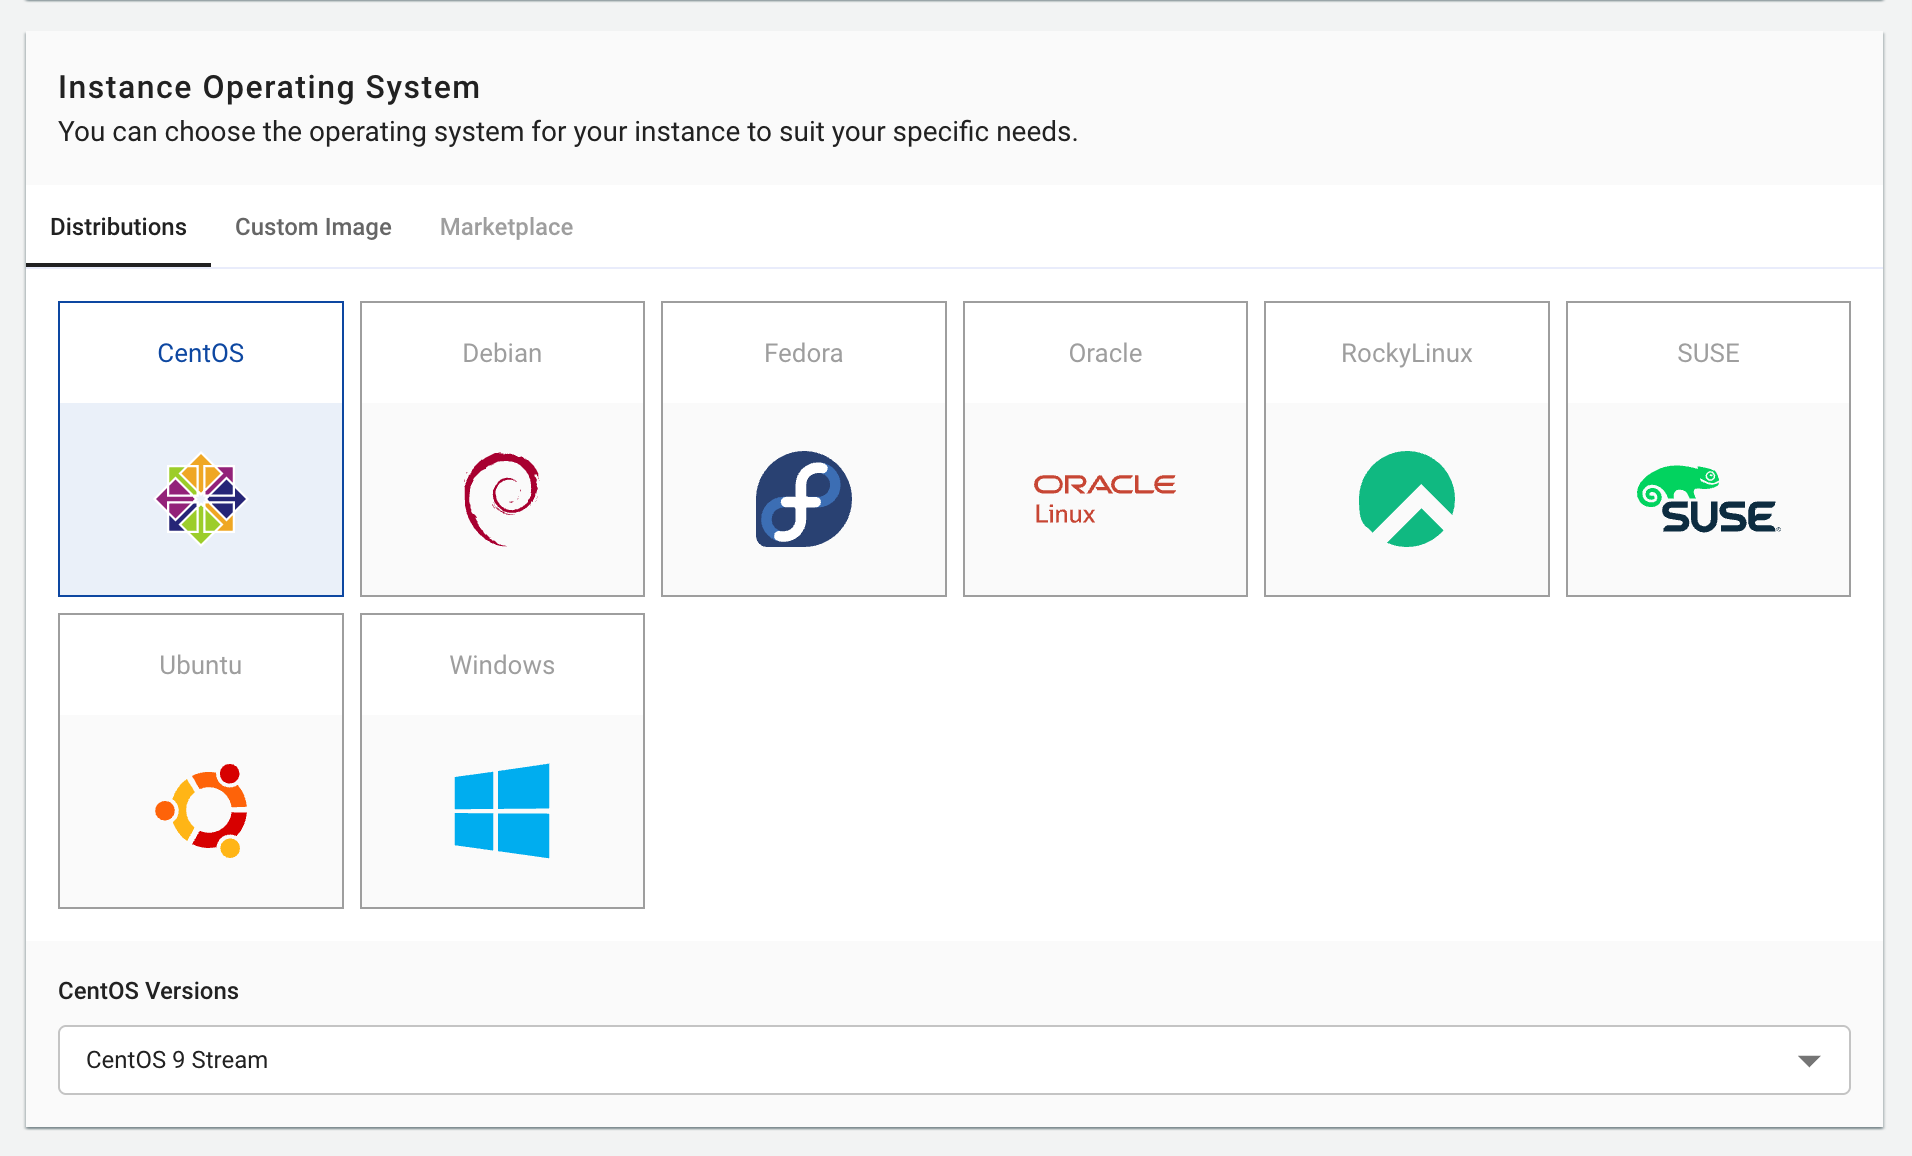
3. Resource Configuration
Select configuration that matches your usage requirements:
| Configuration Type | Characteristics | Best For | Example Use Case |
|---|---|---|---|
| Standard | Balanced CPU and RAM | Web applications, development environments | v2g-standard-2-4 (2 vCPU, 4GB RAM) for WordPress sites |
| Memory-Optimized | Higher RAM ratio | Databases, data processing applications | v2g-memory-2-8 (2 vCPU, 8GB RAM) for MongoDB or Redis |
| Processor-Optimized | Higher CPU ratio | Compute-intensive tasks, game servers | v2g-processor-4-4 (4 vCPU, 4GB RAM) for video processing |
Configuration Recommendations:
- Small website/blog: v2g-standard-1-2 (1 vCPU, 2GB RAM)
- Medium business website: v2g-standard-2-4 (2 vCPU, 4GB RAM)
- Small database server: v2g-memory-2-8 (2 vCPU, 8GB RAM)
- E-commerce website: v2g-standard-4-8 (4 vCPU, 8GB RAM)
- Complex application server: v2g-standard-8-16 (8 vCPU, 16GB RAM)
- Start with smaller configuration and scale up as needed
- Use monitoring to assess actual requirements
- Consider multiple small instances vs. single large instance
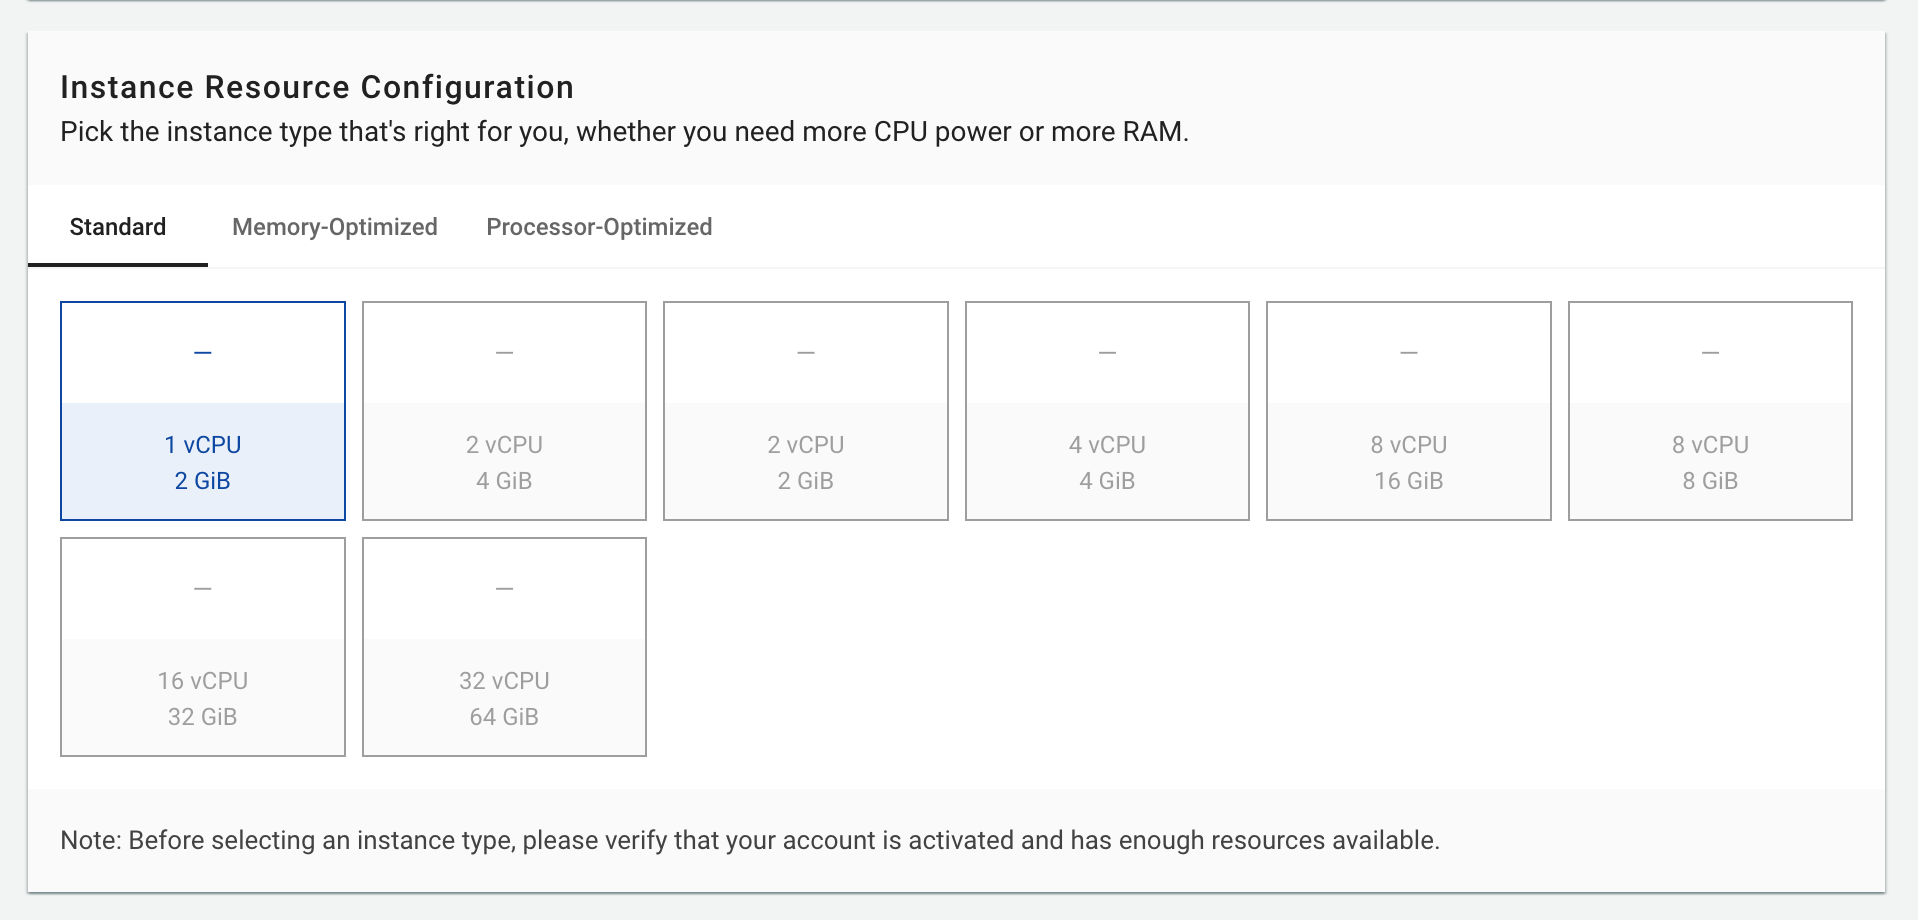
4. Volume Configuration
Configure storage for your instance:
Basic Settings:
- Volume Size: Storage capacity in GB
- Volume Name: Descriptive identifier for the disk
Recommended Sizes:
| Use Case | Recommended Size | Notes |
|---|---|---|
| Basic OS | 20-40GB | Operating system and basic software |
| Web server | 40-80GB | Source code, logs, web assets |
| Database | 100GB+ | Depends on data requirements |
| File server | 500GB+ | Large file storage needs |
- Separate system and data volumes for databases
- Use descriptive names like "web-data" or "mysql-data"
- Plan for future growth when sizing volumes
5. Network Configuration
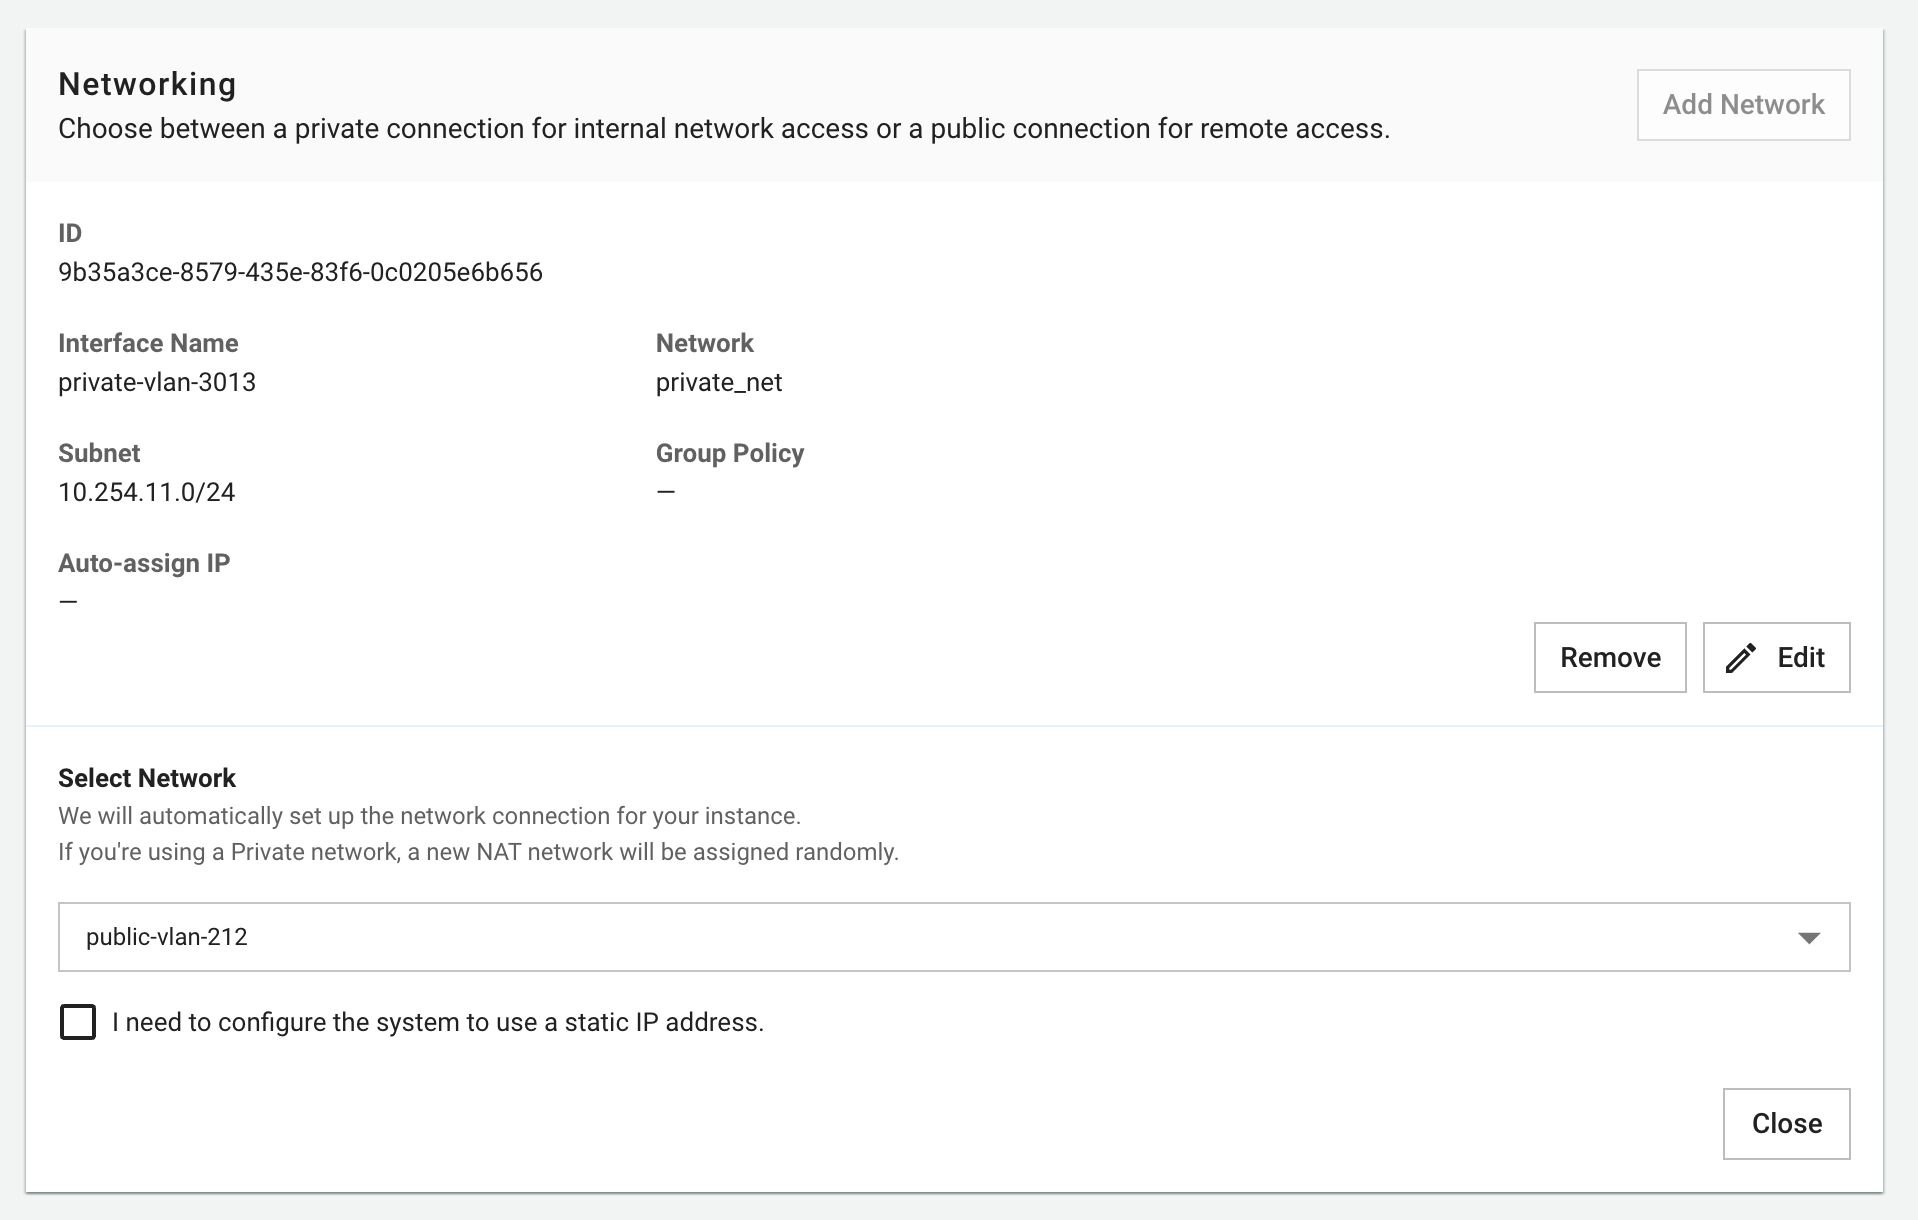
Select network configuration:
Network Types:
- Public Network: Direct internet access with public IP
- VPC Network: Private virtual network for internal communication
Use Cases:
| Network Type | Best For | Security Notes |
|---|---|---|
| Public | Websites, internet-facing services | Requires careful security group setup |
| VPC | Databases, internal services, multi-tier apps | Higher security, no direct internet access |
- Public networks are convenient but expose more attack surface
- VPC networks provide additional security layers
- Use Reserved IPs for servers requiring static addresses
6. Firewall Settings
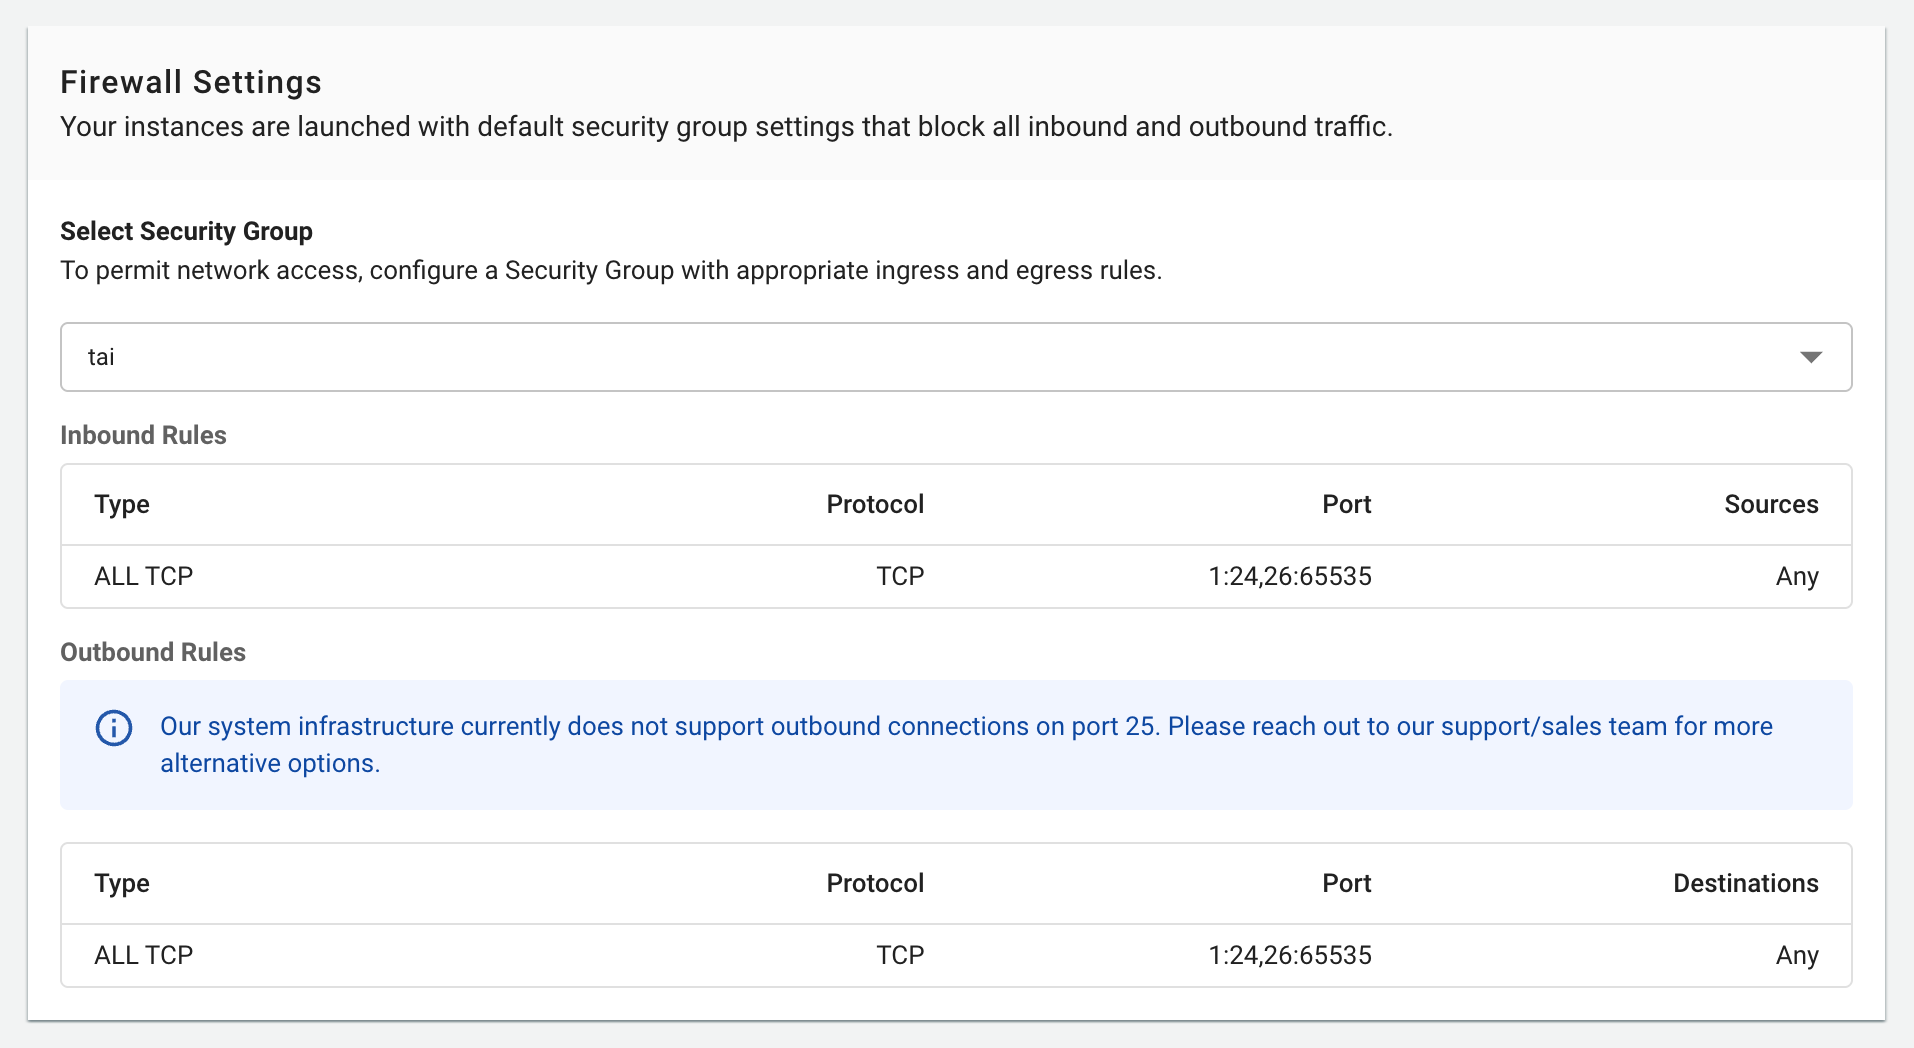
Configure security settings:
Options:
- Default Configuration: Basic security rules
- Custom Configuration: Create custom firewall rules
Common Default Ports:
- SSH (22) for Linux
- RDP (3389) for Windows
- HTTP/HTTPS (80/443) for web servers
Recommended Port Configuration:
| Server Type | Required Ports | Security Notes |
|---|---|---|
| Web Server | 80, 443, 22 | Restrict SSH to admin IPs only |
| Database | 3306/5432 | Allow only from application servers |
| Application | Application-specific | Limit access to necessary IPs |
Apply "least privilege" principle - only open required ports and restrict source IPs
7. Authentication Method
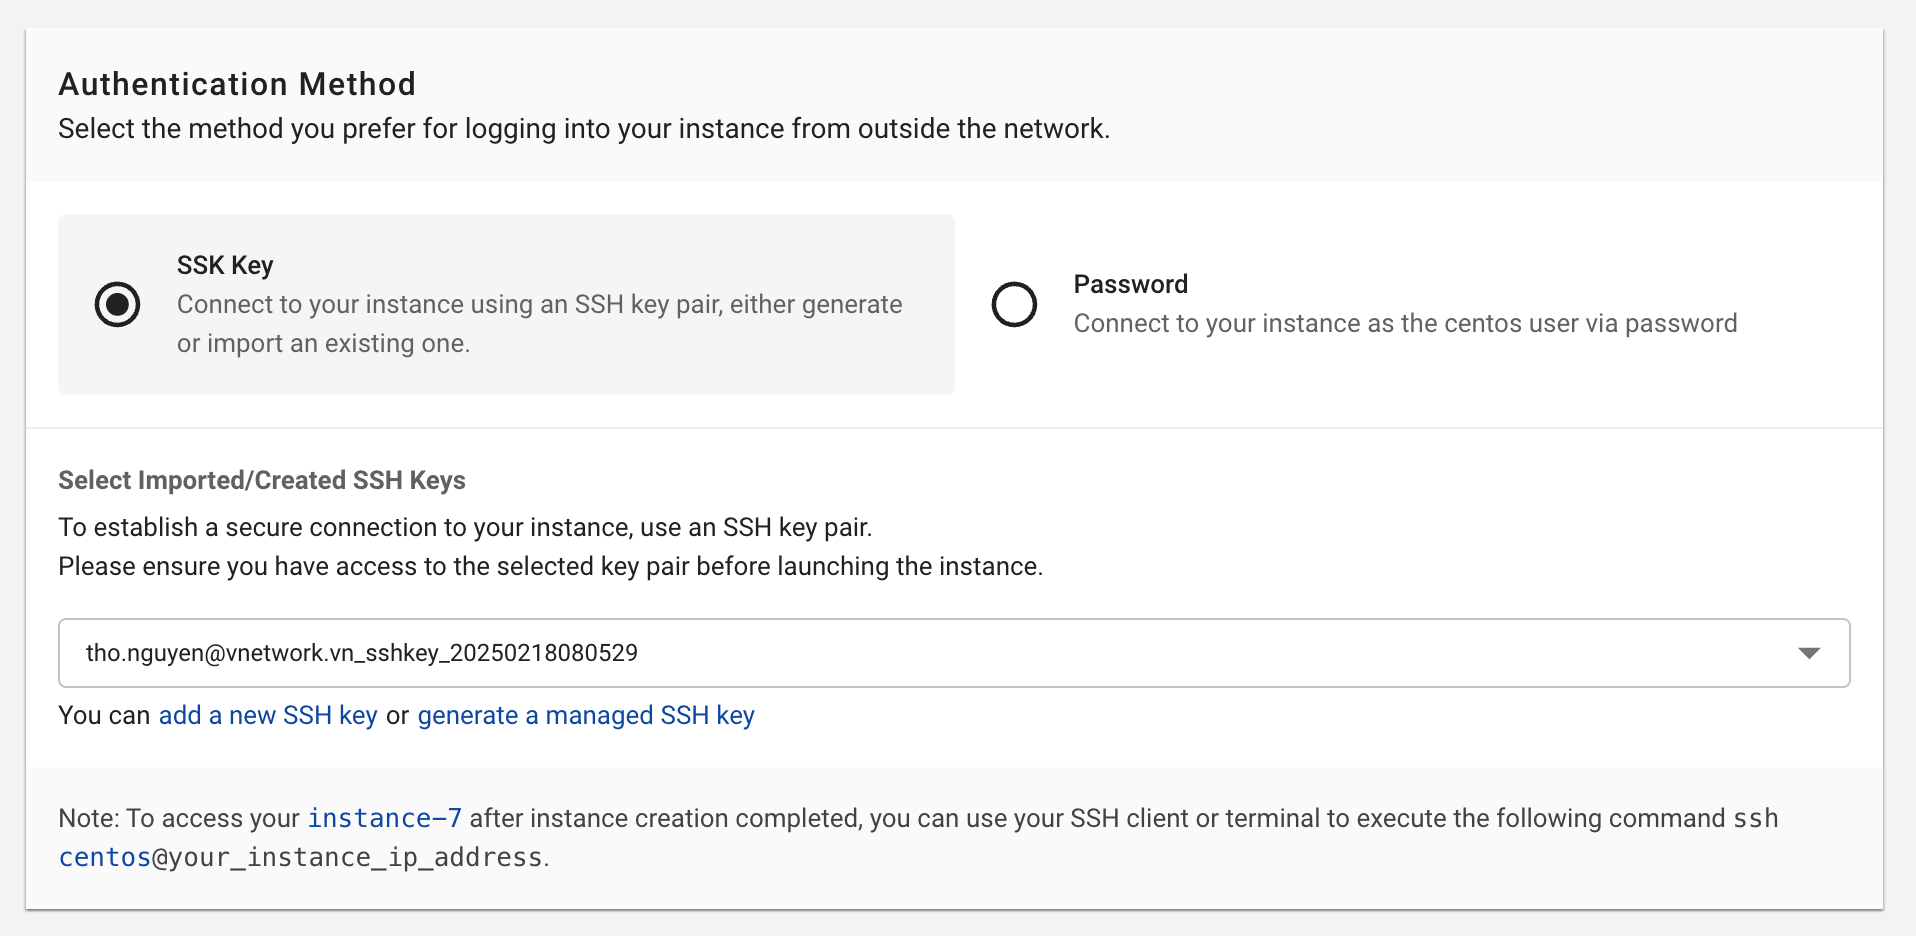
Choose login method:
Authentication Types:
- SSH Key (Linux): High security using public/private key pairs
- Password (Linux/Windows): Username and password login

SSH Key Management:
- Import: Upload existing public key (OpenSSH format)
- Auto-Generate: System creates new key pair
SSH Key Setup Process:
- Choose "Auto-Generate" or "Import" existing key
- Download private key file (.pem) - ONE TIME ONLY
- Store securely (typically in ~/.ssh/ directory)
- Set proper permissions:
chmod 400 yourkey.pem - Connect using:
ssh -i yourkey.pem username@server-ip
Password Requirements (if using password authentication):
- Minimum 12 characters
- Mix of uppercase, lowercase, numbers, and special characters
- Private SSH key (.pem) downloads ONLY ONCE
- System does NOT store private key copies
- Lost keys require generating new keys and server updates
Review and Create
Review configuration before creating the instance:
Verify These Settings:
- Server name and purpose
- Operating system and version
- CPU and RAM configuration
- Volume size and storage needs
- Network configuration and security groups
- Authentication method setup
Click Create Instance to begin the creation process.
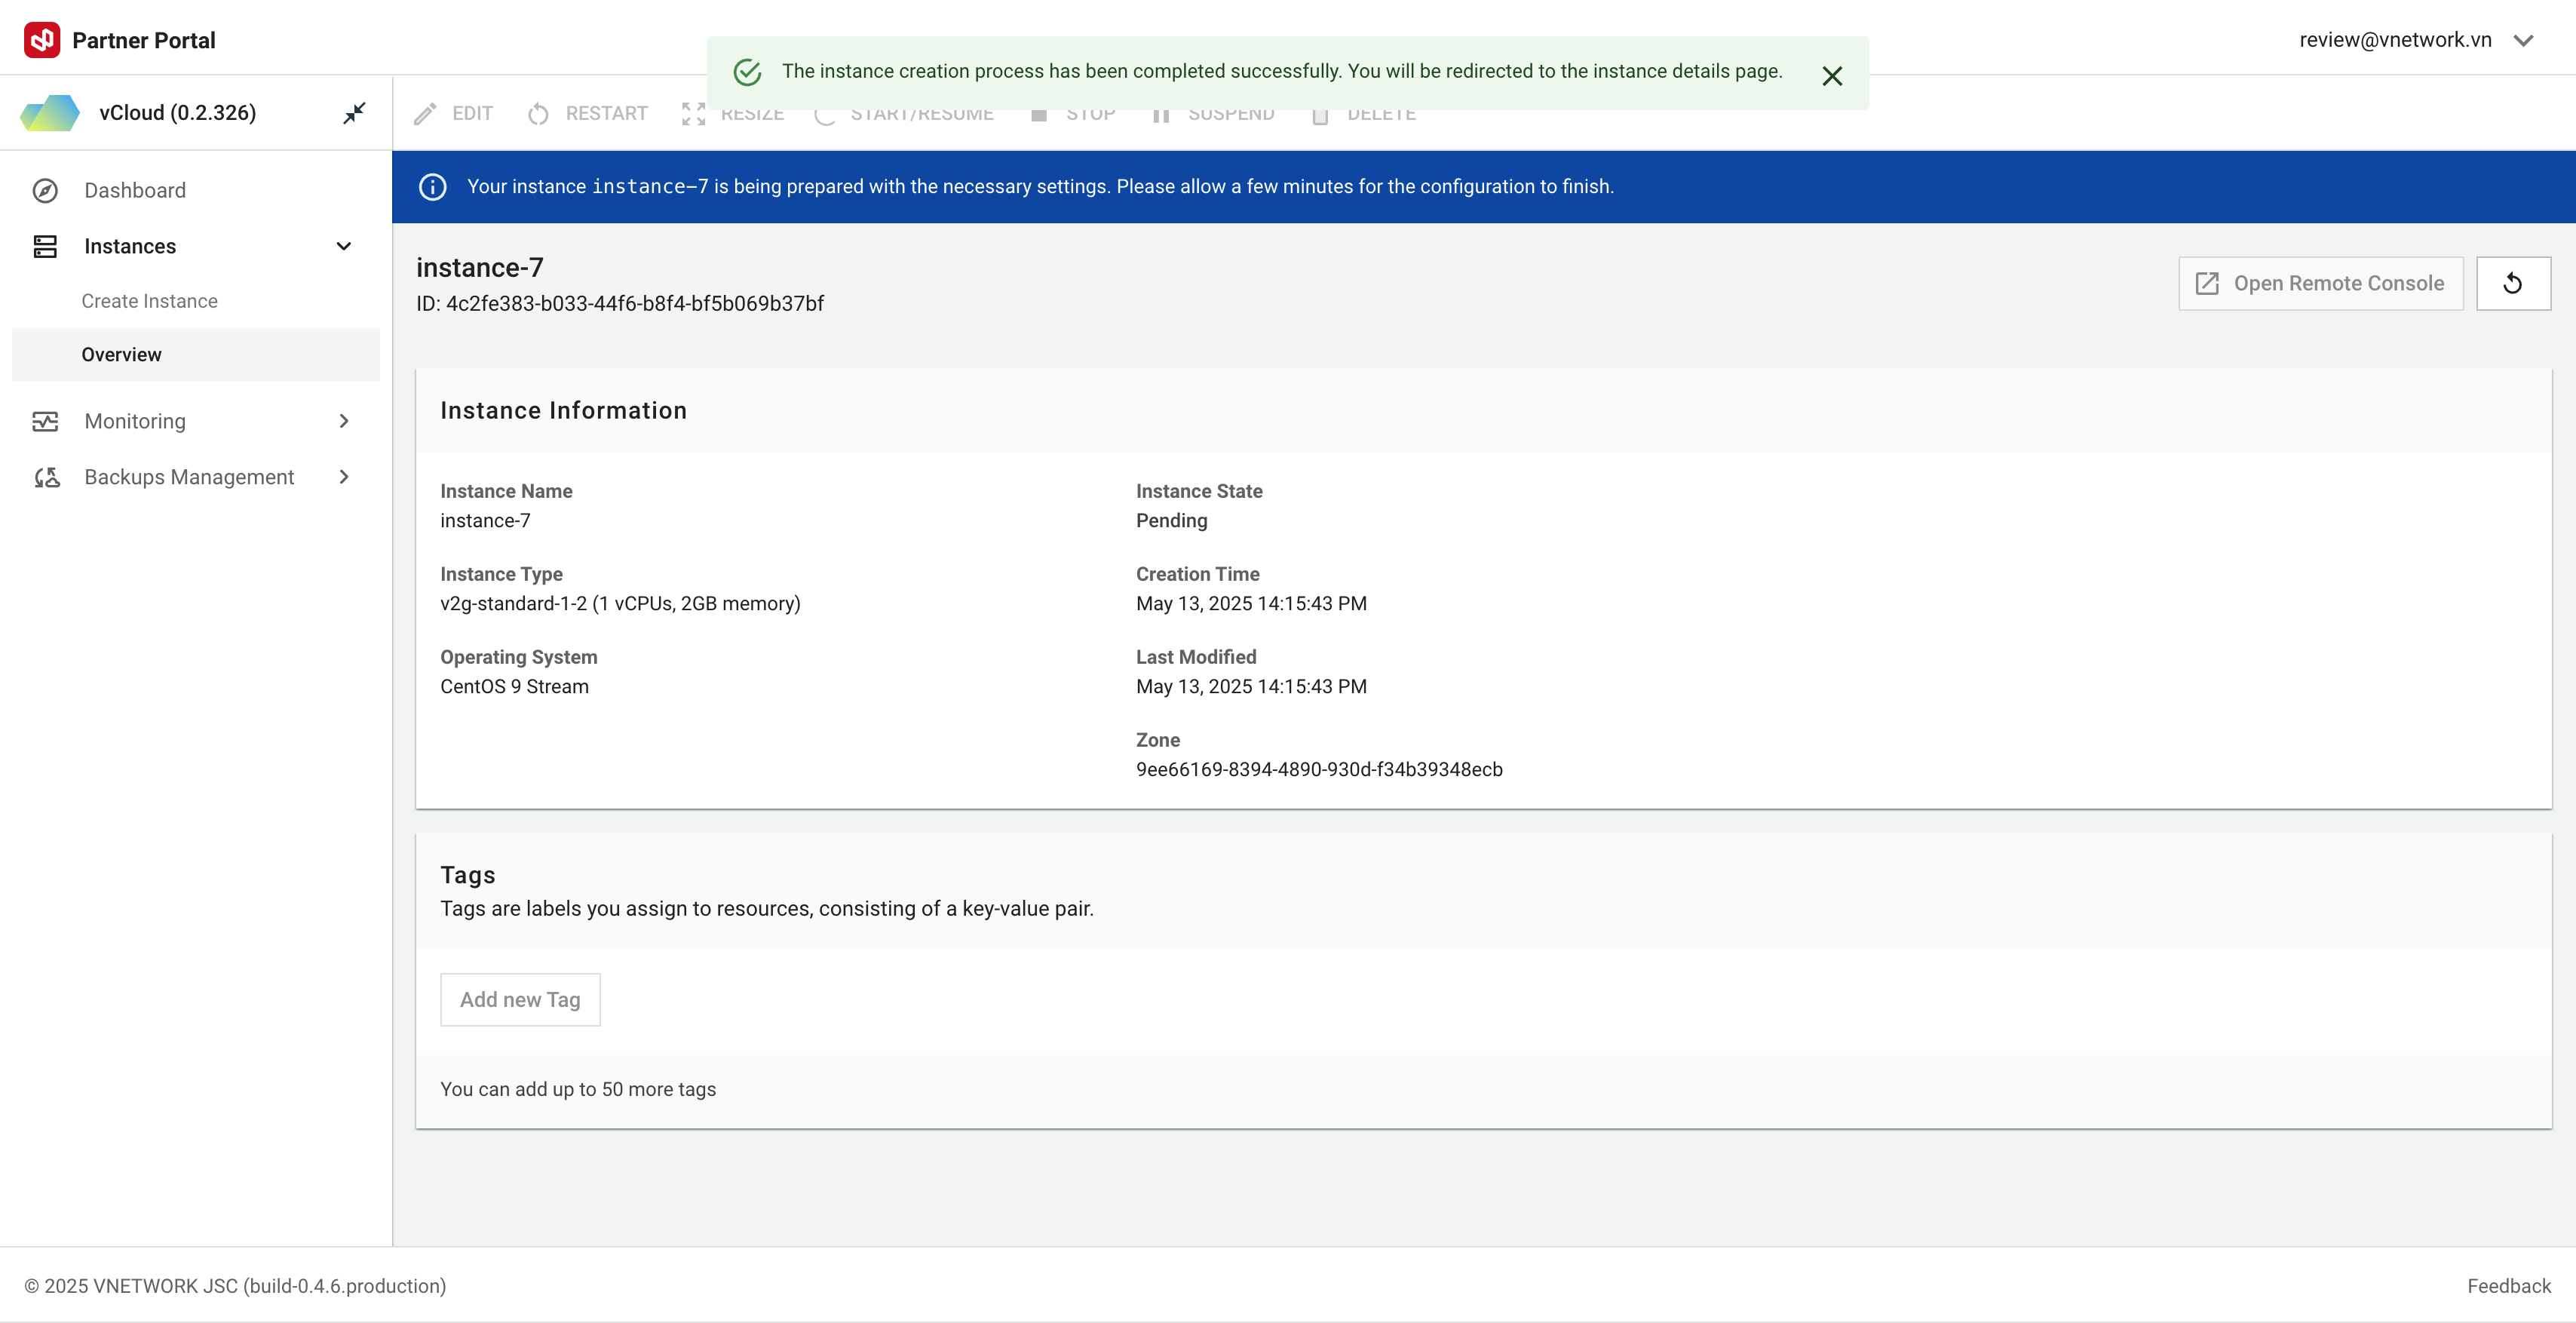
Creation Process
Expected Timeline:
- Initial provisioning: 15-30 seconds
- Complete boot: 1-2 minutes depending on OS
Post-Creation Steps
Complete these essential steps after instance creation:
1. Connect to Server
Linux:
# Using SSH Key
ssh -i /path/to/private-key.pem username@server-ip

# Example
ssh -i ~/.ssh/myserver.pem ubuntu@203.0.113.10
Windows:
- Use Remote Desktop Connection (mstsc.exe)
- Enter server IP address
- Provide username and password
2. Update Operating System
Linux (Ubuntu/Debian):
sudo apt update && sudo apt upgrade -y
Linux (CentOS/RHEL):
sudo yum update -y
3. Basic Security Setup
Linux:
# Configure firewall
sudo ufw allow ssh
sudo ufw allow http
sudo ufw allow https
sudo ufw enable

# Install fail2ban for SSH protection
sudo apt install fail2ban -y
4. Create Initial Backup
Create a snapshot after completing basic configuration for recovery purposes.
- Monitor Performance: Enable resource monitoring
- Regular Updates: Keep OS and applications current
- Automated Backups: Set up recurring backup schedules
- Document Configuration: Record important setup steps
- Test Connectivity: Verify applications work and are accessible